Articles enable Woodcraft Folk members to write about their experiences of using materials from the archive. Public articles are available on the Chosen For You page, where they most recent articles are presented along with a link to a full listing of public articles. Articles by a specific member can also be accessed from that member's profile page if it has been made public.
Becoming an Article Author
Members can be given permission to become article authors by contacting the website administrators using the contact form. Once a member has been made a author the MANAGE MY ARTICLES button will appear on their dashboard page. This opens a page showing a listing of articles they have written. A panel listing their articles will also be displayed in the profile page. This will show the most recent articles you have worked on. Other members can only see your public articles but you will be able to see both public and private articles.

Creating and Editing an Article
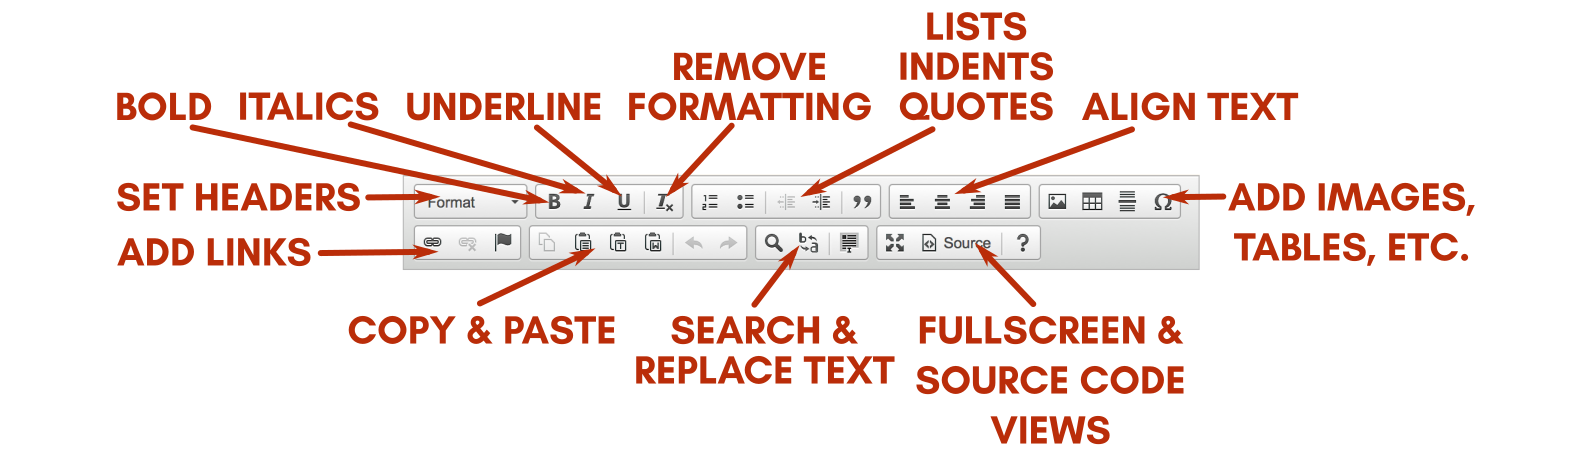
To Create a new article click the CREATE ARTICLE button in the articles panel on your prolife page or on the Manage My Articles page. This will open the article editor page. Each article must have a title. The edit panel for the article content provides a set of standard text formatting tools similar to that of a word processing tool.
To edit an existing article, open the article page and you will see an EDIT THIS ARTICLE button at the bottom of the screen below the article content. Click on this to open the article in the editor page. Alternatively you can find the article in your Manage My Articles page and click the EDIT button.
If you are working on a draft version of the article and do not want it to be seen by others select the PRIVATE option.
Once you have written or edited the article click the SAVE ARTICLE or SAVE CHANGES button.
Adding Images to an Article
You can add images to an article from elsewhere on the Internet, such as the Woodcraft Folk Heritage site, or upload your own.
Click the IMAGE button in the editor. A new panel will open.
To link to image on the Heritage site or from elsewhere on the Internet, find the image, right-click on the image and choose the 'Copy Image Location' or 'Copy Image Address' option. Click on the LINK tab on the Image panel and paste the image location into the URL field.
To upload an image, click on the UPLOAD tab in the Image panel. Click on the BROWSE button. A file finder window will open, find you image and select it's name and click OPEN or OK. Now click the SEND IT TO SERVER button. Once your image is uploaded it will be displayed in the IMAGE INFO panel, click OK to add it to the article.
You can adjust the size of your image in the edit panel by clicking on it and then dragging one of the square handles that will appear around the image. For the best results however we recommend that you do not resize images on the page as this often results in images that do not display well on mobile and tablet screens.
For best results, resize your image to the largest size you want it before adding to your article. Add the image as described above but when the image appears in the IMAGE INFO panel, delete the width and height values so that these boxes are empty, and then click OK. This way your image will be automatically scaled to the best size when viewed on different sized screens.